How to Write AI Portrait Prompts for Natural Light
Describe the light source, face angle, and setting in an AI portrait prompt without relying on long lists of photographic adjectives.
Nov 9, 20265 min read
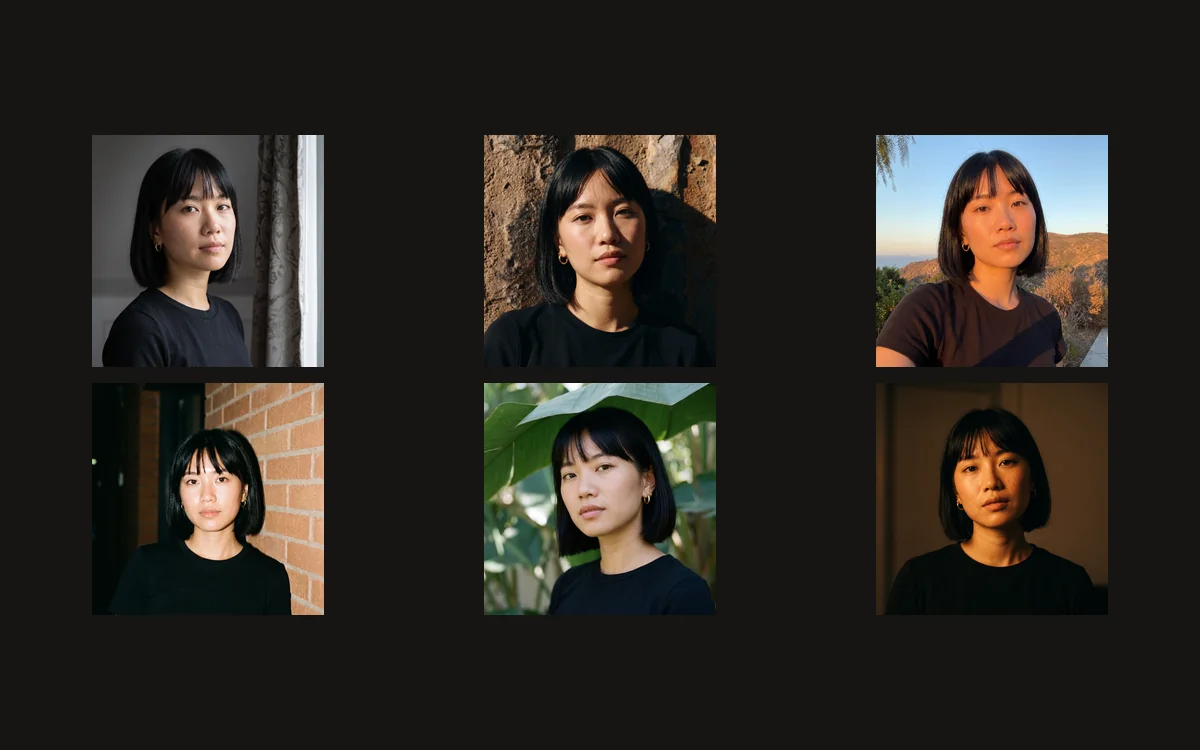
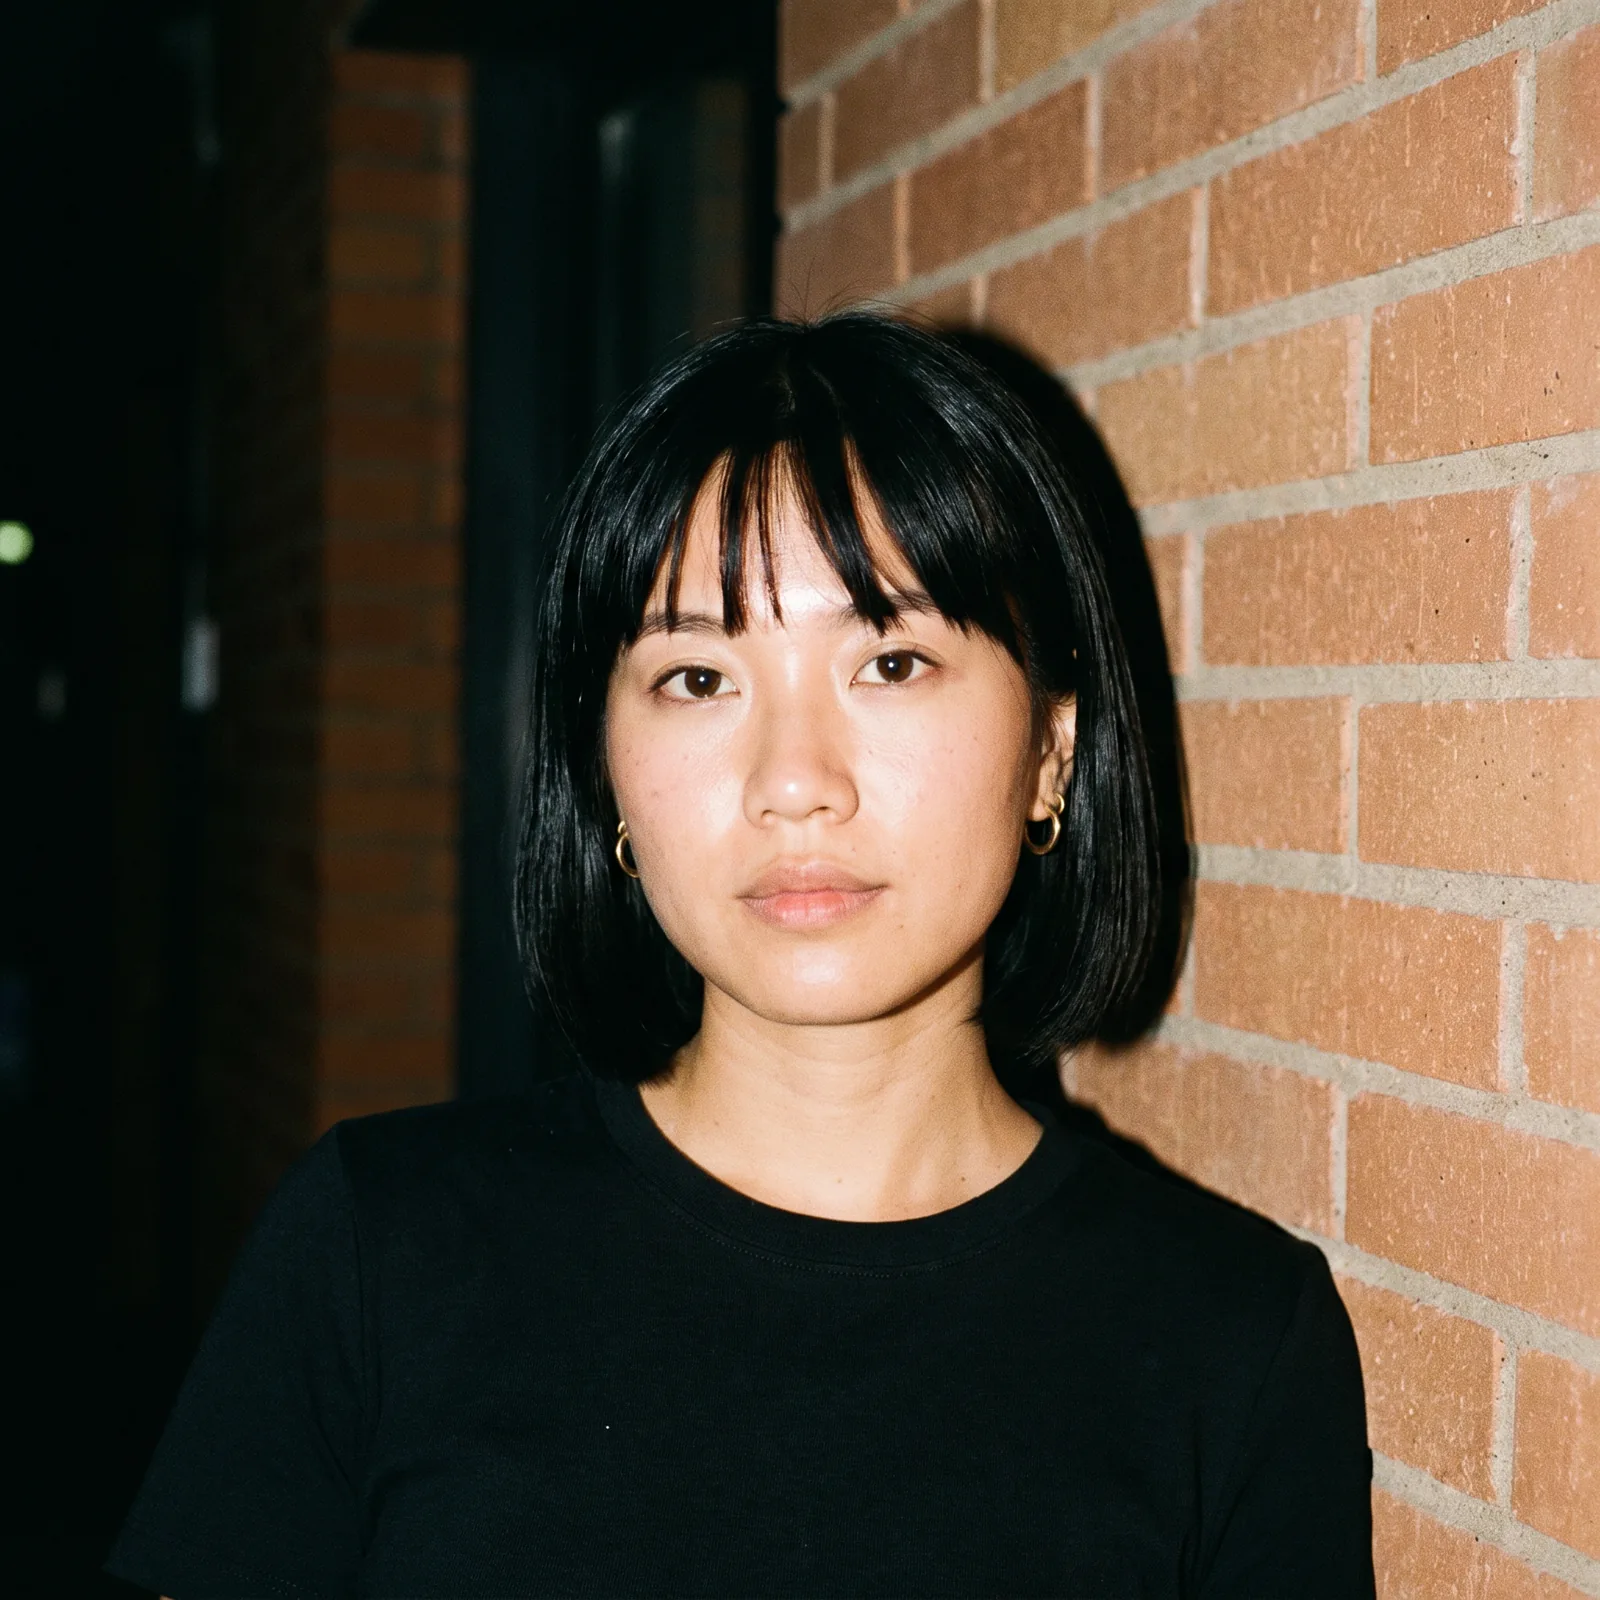
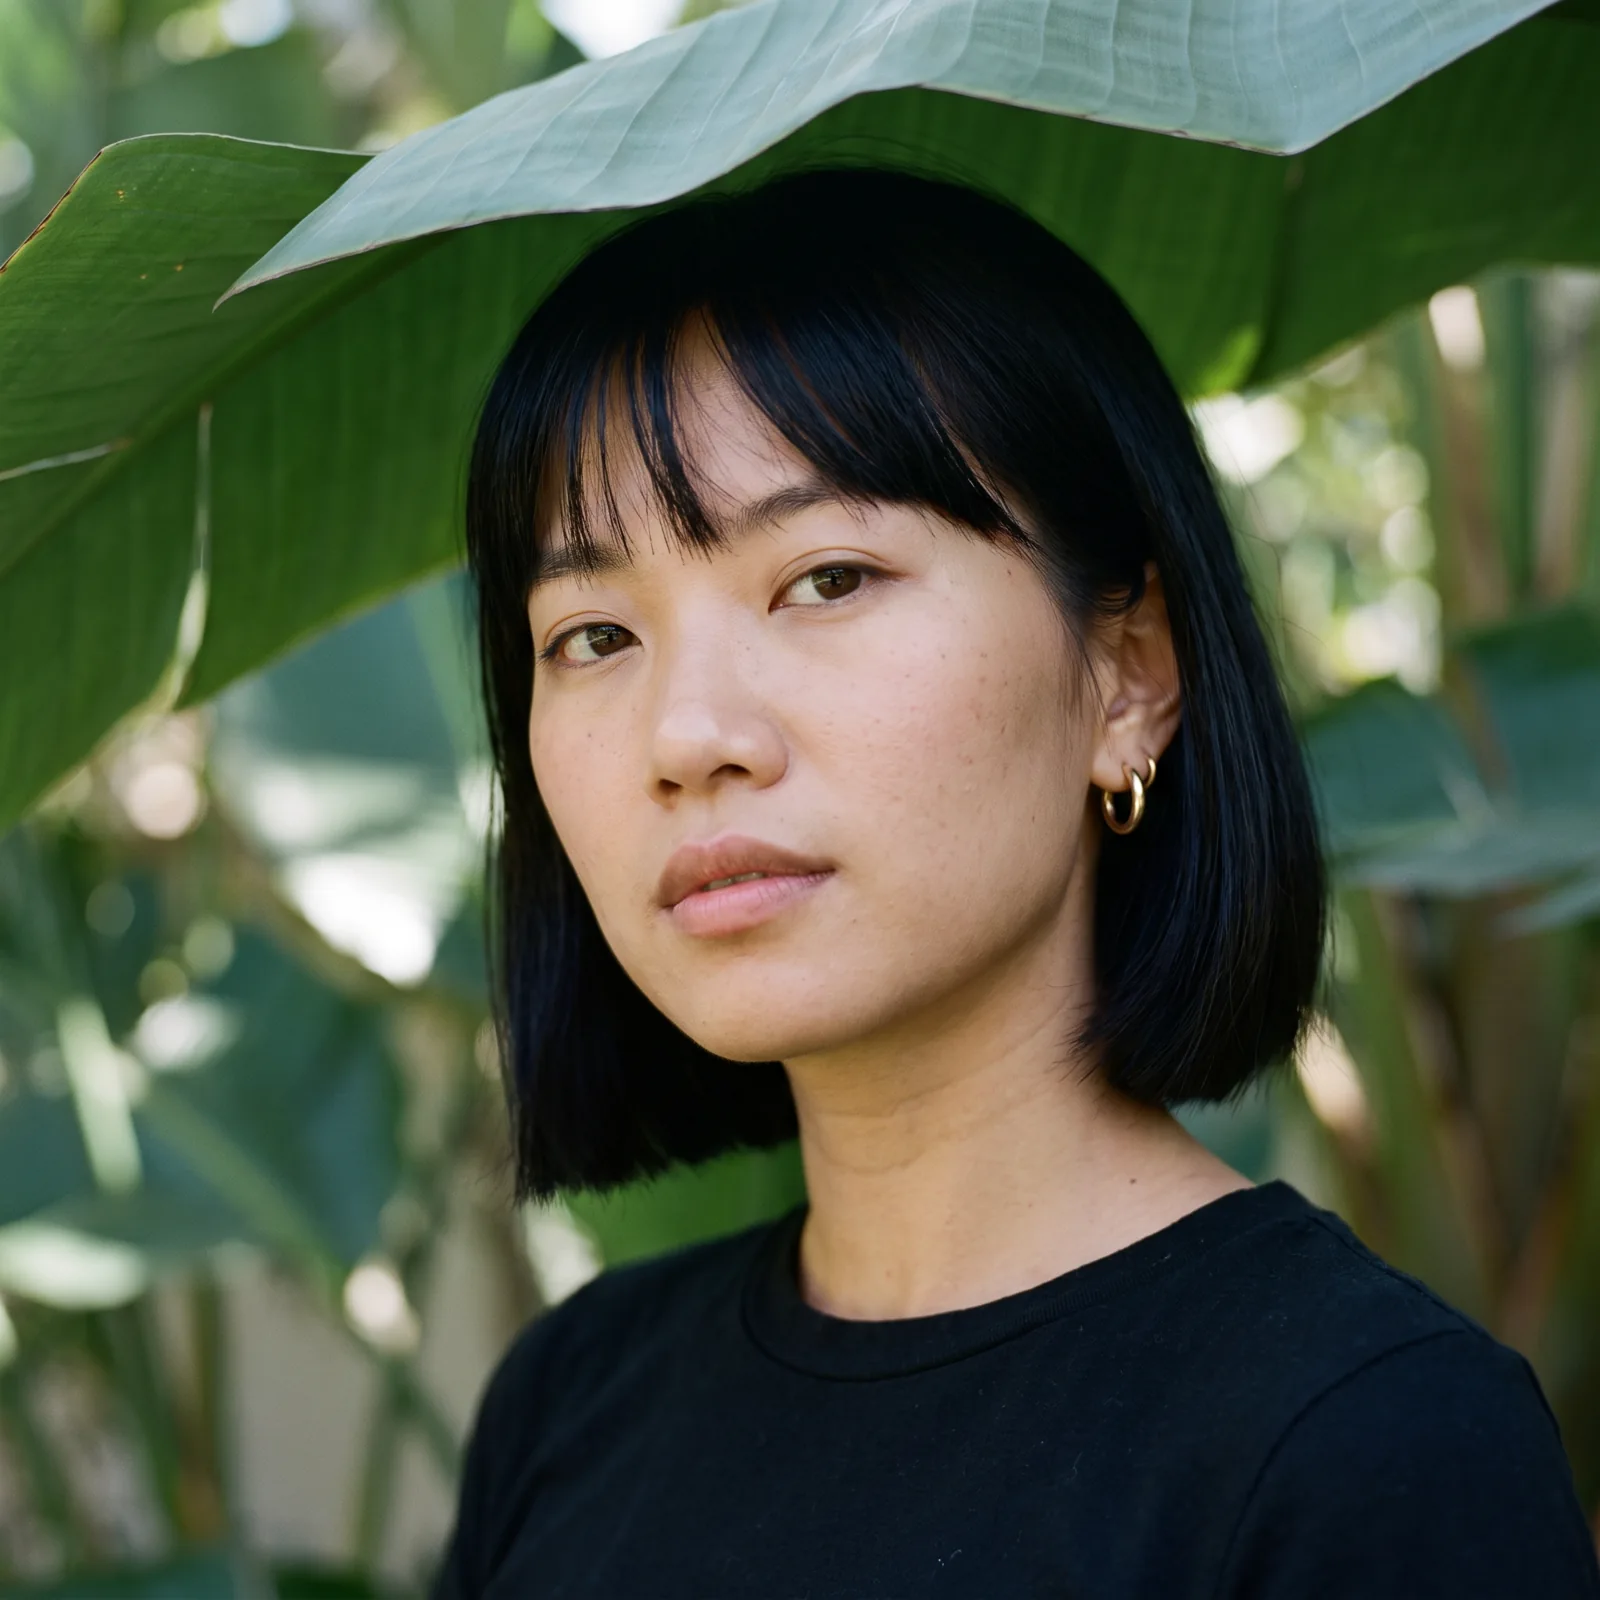
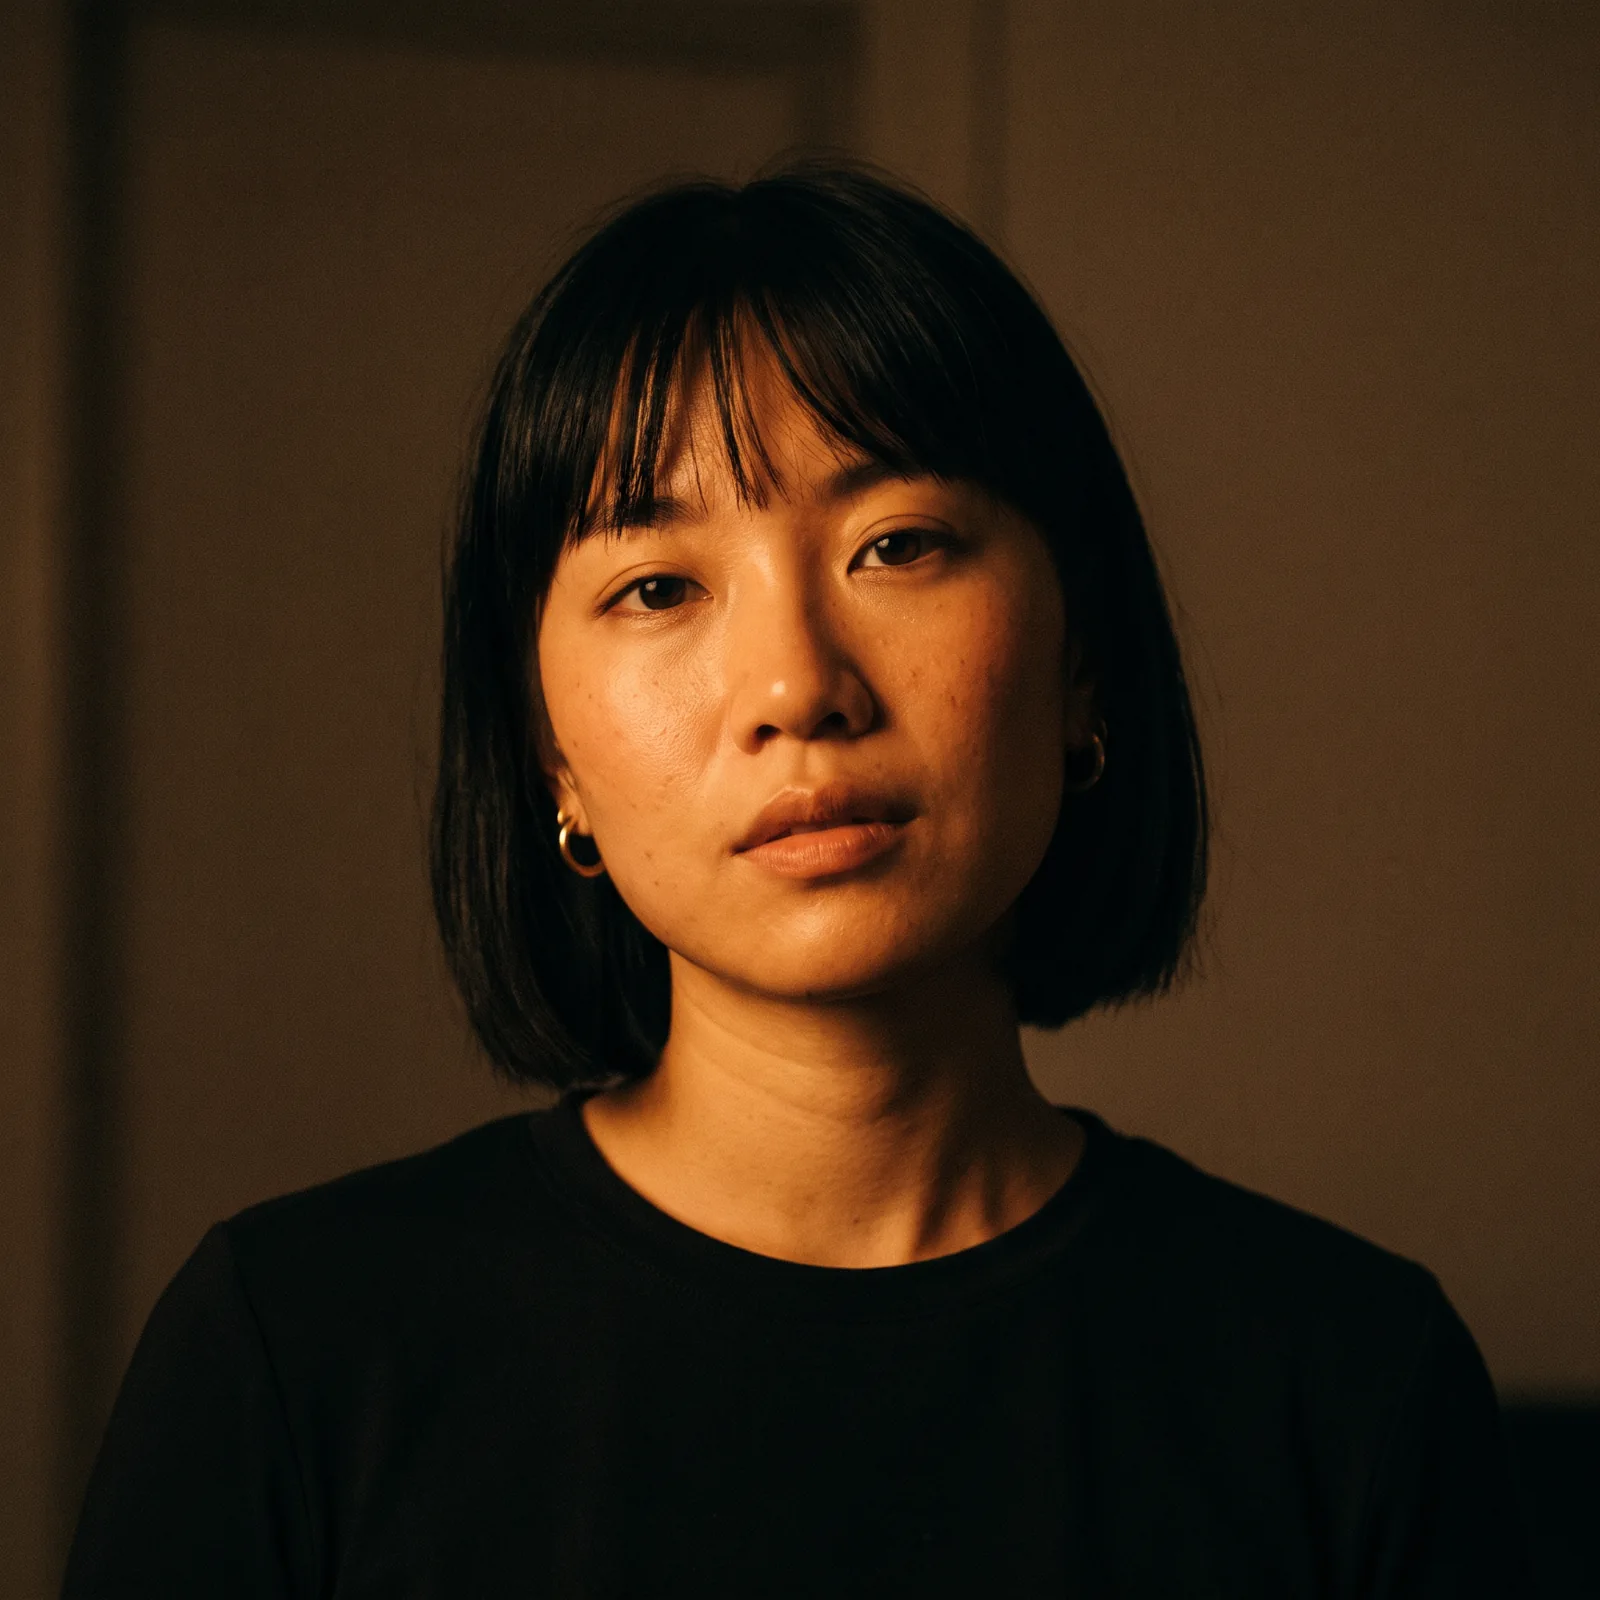
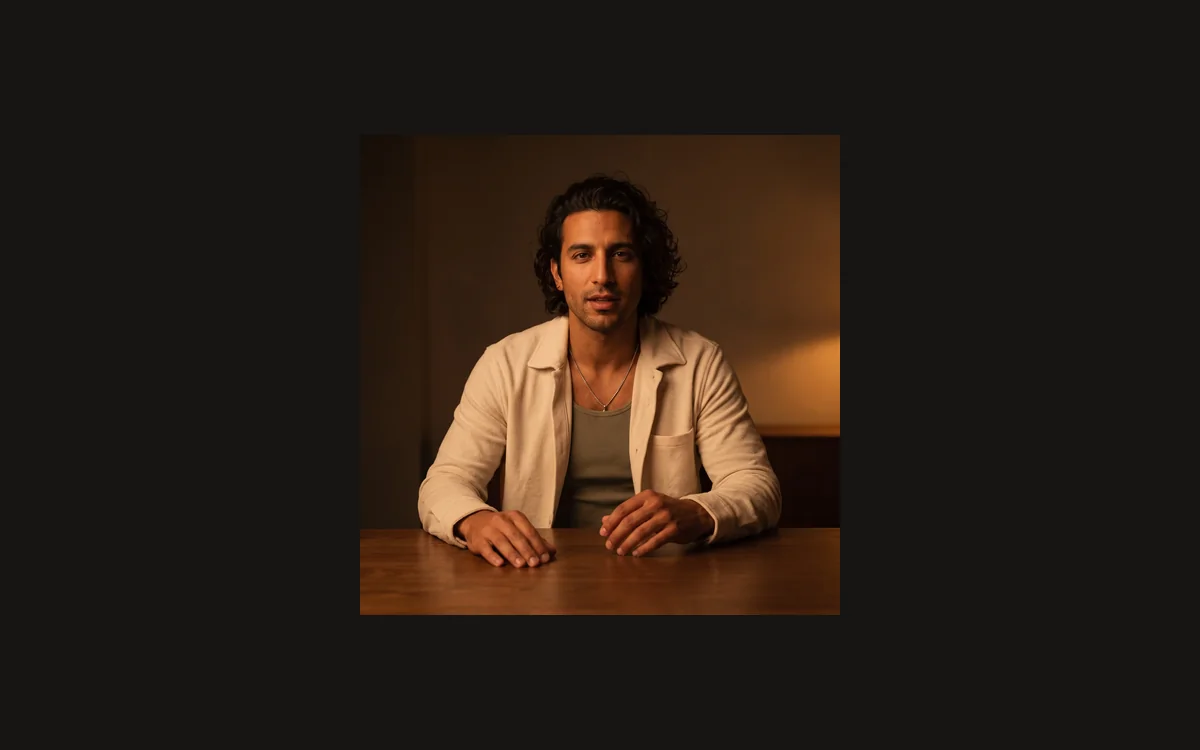
Compare the six portraits of Mika below. Mika supplies the saved standard-character face; a different Visual Inspiration Gallery reference supplies each lighting direction and setting. Four examples use daylight, while direct flash and warm practical light show two useful artificial-light comparisons.
Soft window light — A curtained window at camera right creates a gradual cheek shadow.Hard side light — Crisper shadows and a textured wall make the direction of the sun clear.Golden-hour sun — Low warm sunlight changes skin highlights and the overall colour cast.Direct flash · artificial — Frontal flash lights the face against a dimmer brick setting.Open shade — A leafy canopy gives cooler, more even daylight with restrained contrast.Warm practical · artificial — Amber indoor light creates a warmer, lower-key treatment than daylight.
The presenter is a standard Affogato fictional character. The saved character supplies identity; the Gallery references supply the photographic direction.
Describe where the light comes from
Begin with a reference you can describe. In Visual Inspiration Gallery, search for window light, hard light, golden hour, shade, flash or low light. Open a photograph and inspect its Image prompt. Look for the source direction, shadow edge, colour cast and relationship between the face and background.
“Natural light” is too broad to describe all four daylight examples here. A large curtained window creates a gradual cheek shadow. Hard sun creates a sharper boundary. Golden-hour sun changes the colour as well as the shadow. Open shade produces a quieter, cooler treatment under the leaves. Name the condition you want rather than relying on “beautiful light.”
Use the Gallery reference as a real visual input, not just a prompt-writing decoration. Our comparisons keep its distinctive photographic treatment and an environment that makes the light plausible. They are different scenes, not a controlled experiment in which every variable except illumination stays identical.
Search the Gallery for a light type, open a photograph and inspect its Image prompt before choosing it. The references linked beside the examples below were used as actual image inputs.
Keep the person’s identity separate from the lighting brief
Select a standard Affogato character first. We used Mika, with her short dark bob and straight bangs. Her saved portrait establishes the face and hair. The Gallery photograph supplies the light and environment, not the identity of the person photographed there.
In Image Studio Edit, keep Mika’s reference and the selected Gallery image in separate reference slots. State their roles explicitly: preserve Mika’s exact identity, then borrow the Gallery lighting and setting. A prompt that simply says “use this woman” leaves it unclear which reference should determine the face.
Keep the character styling simple enough to compare the light. We asked for the same black crew-neck shirt, a relaxed expression and a close head-and-shoulders view. The exact submitted prompt appears with each image, so you can copy the reference roles as well as the lighting words.
Make the face angle and camera framing work together
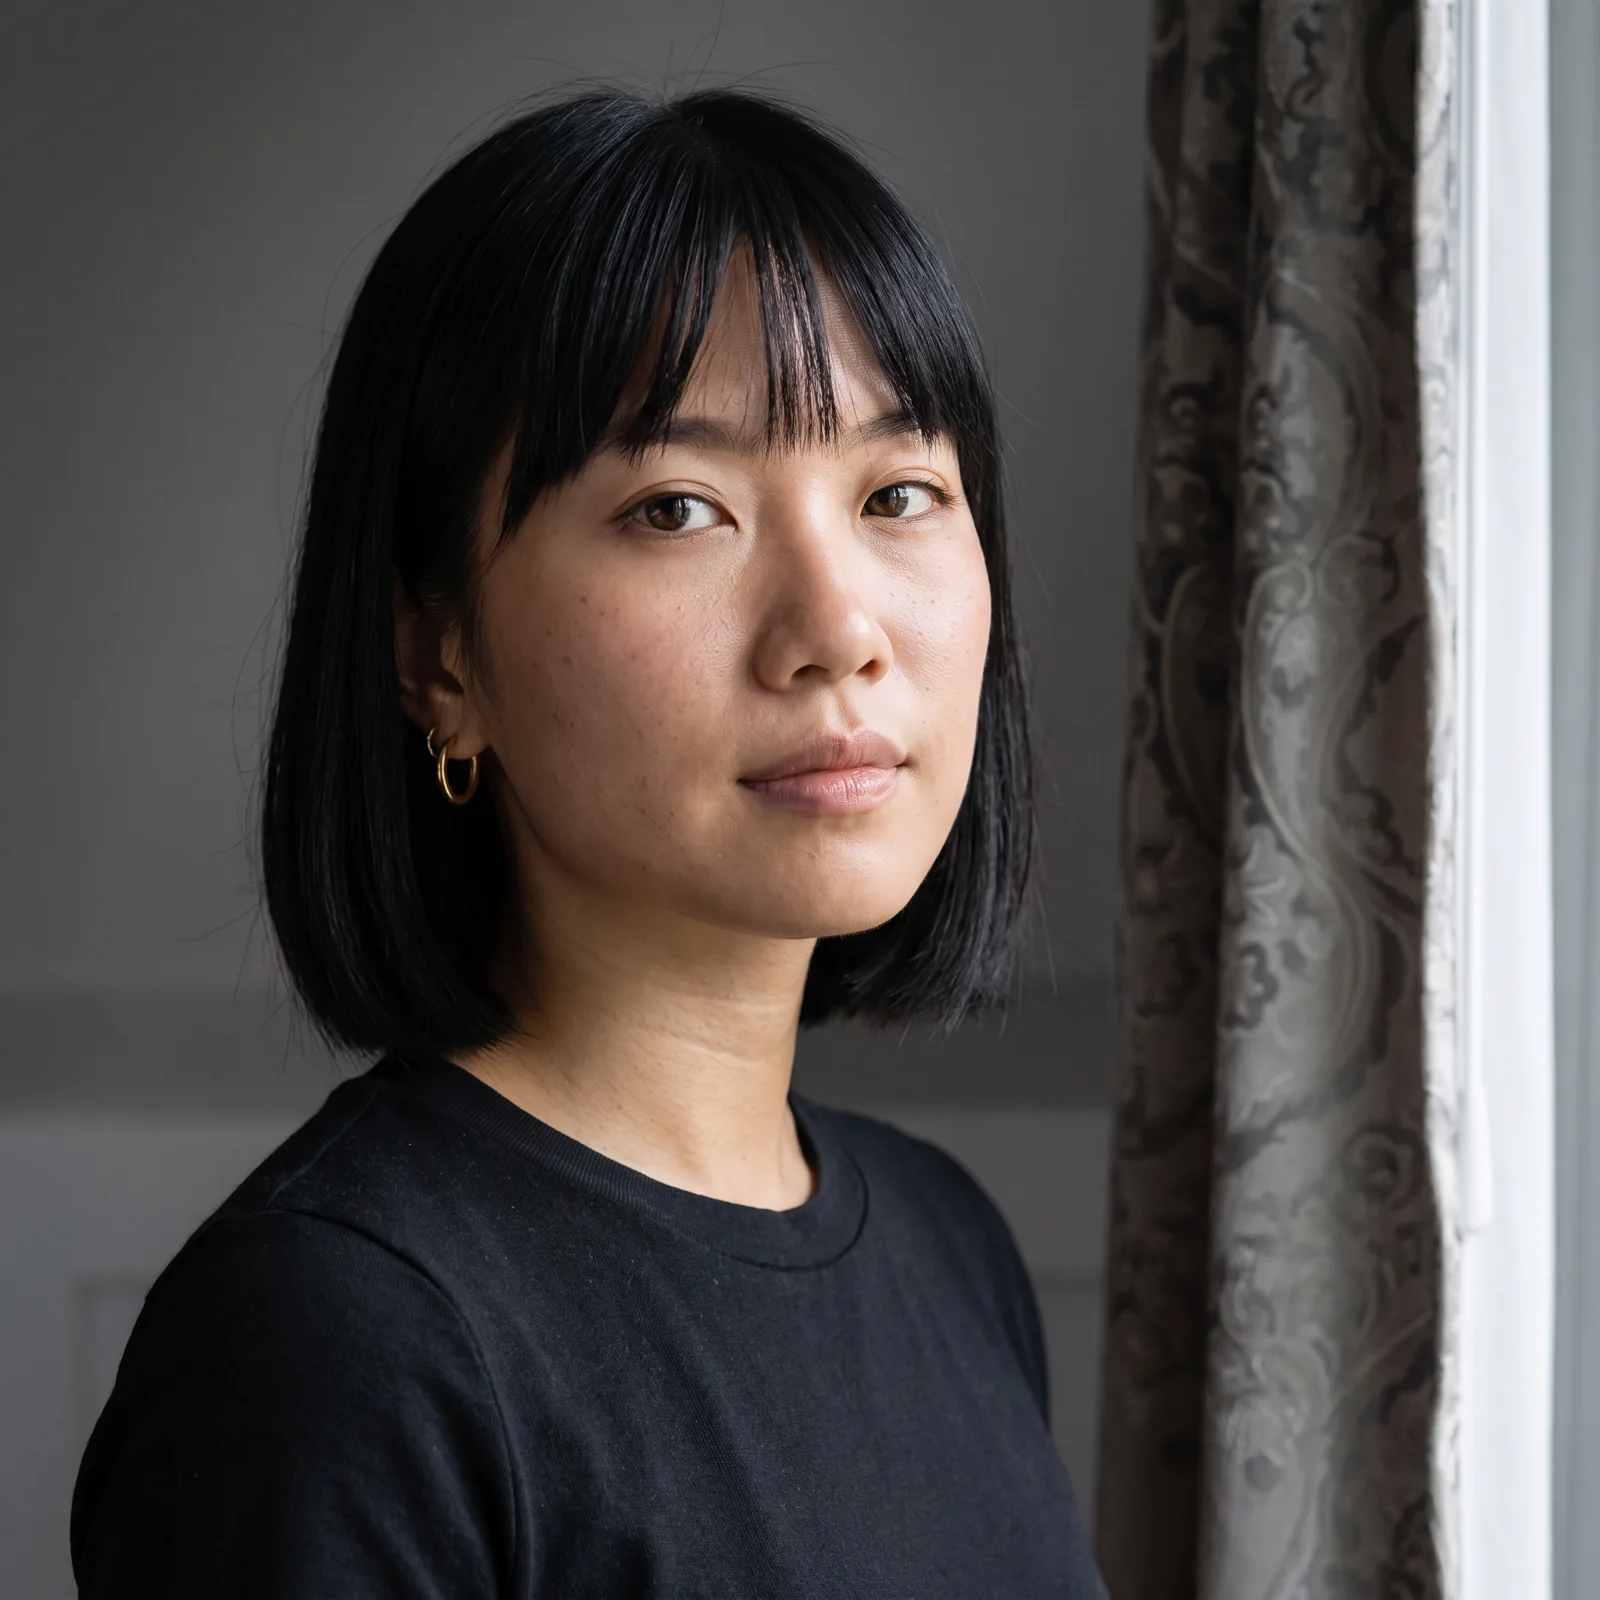
For soft window light, notice the curtain edge and the broad highlight on the face. The useful wording is a large curtained window on one side, gradual cheek shadow, and readable eyes. Do not add direct flash to the same brief when a soft daylight portrait is the goal.
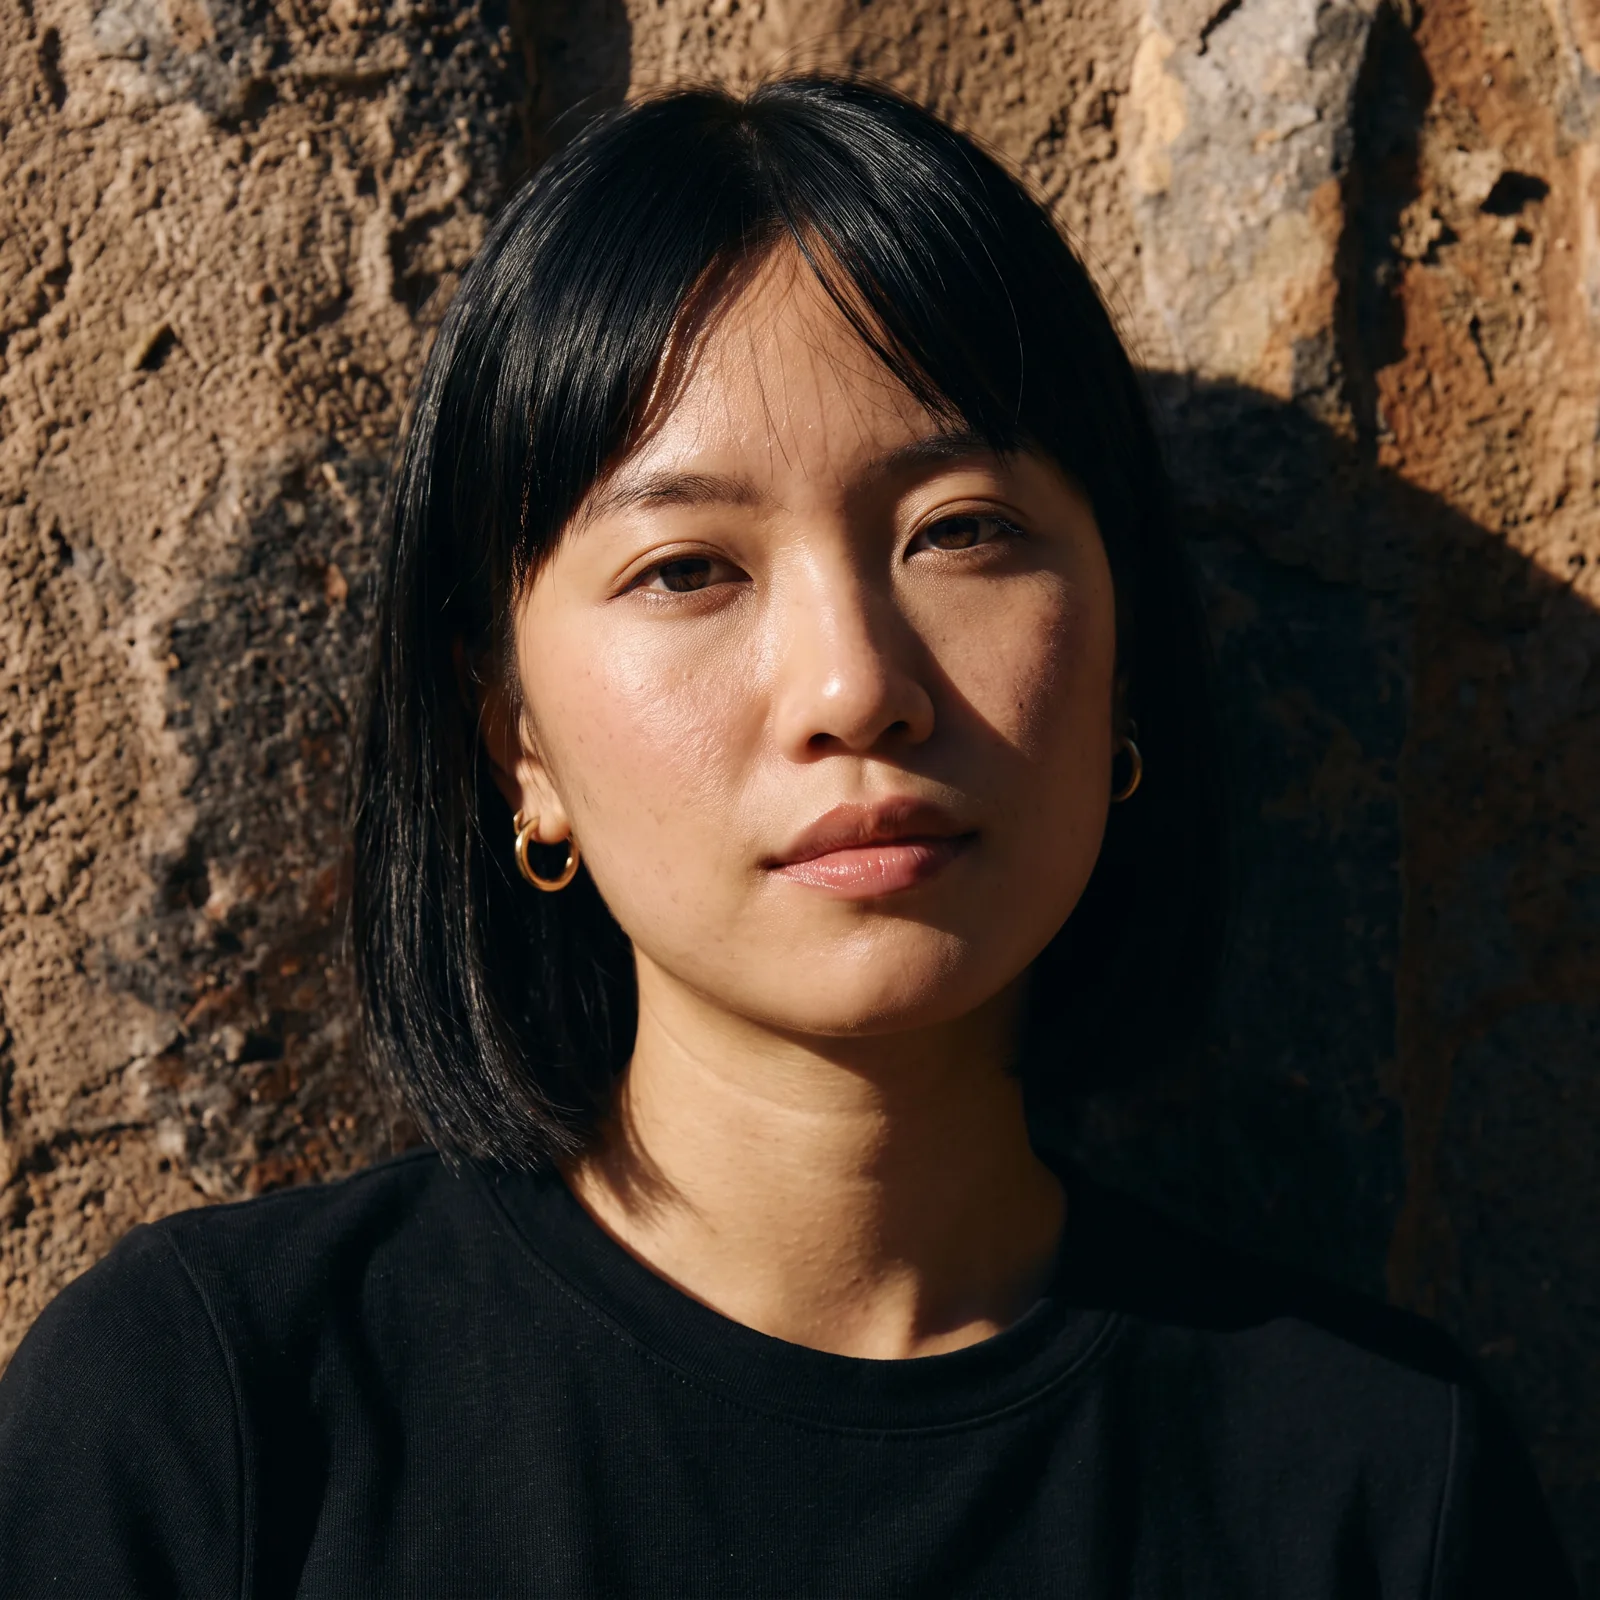
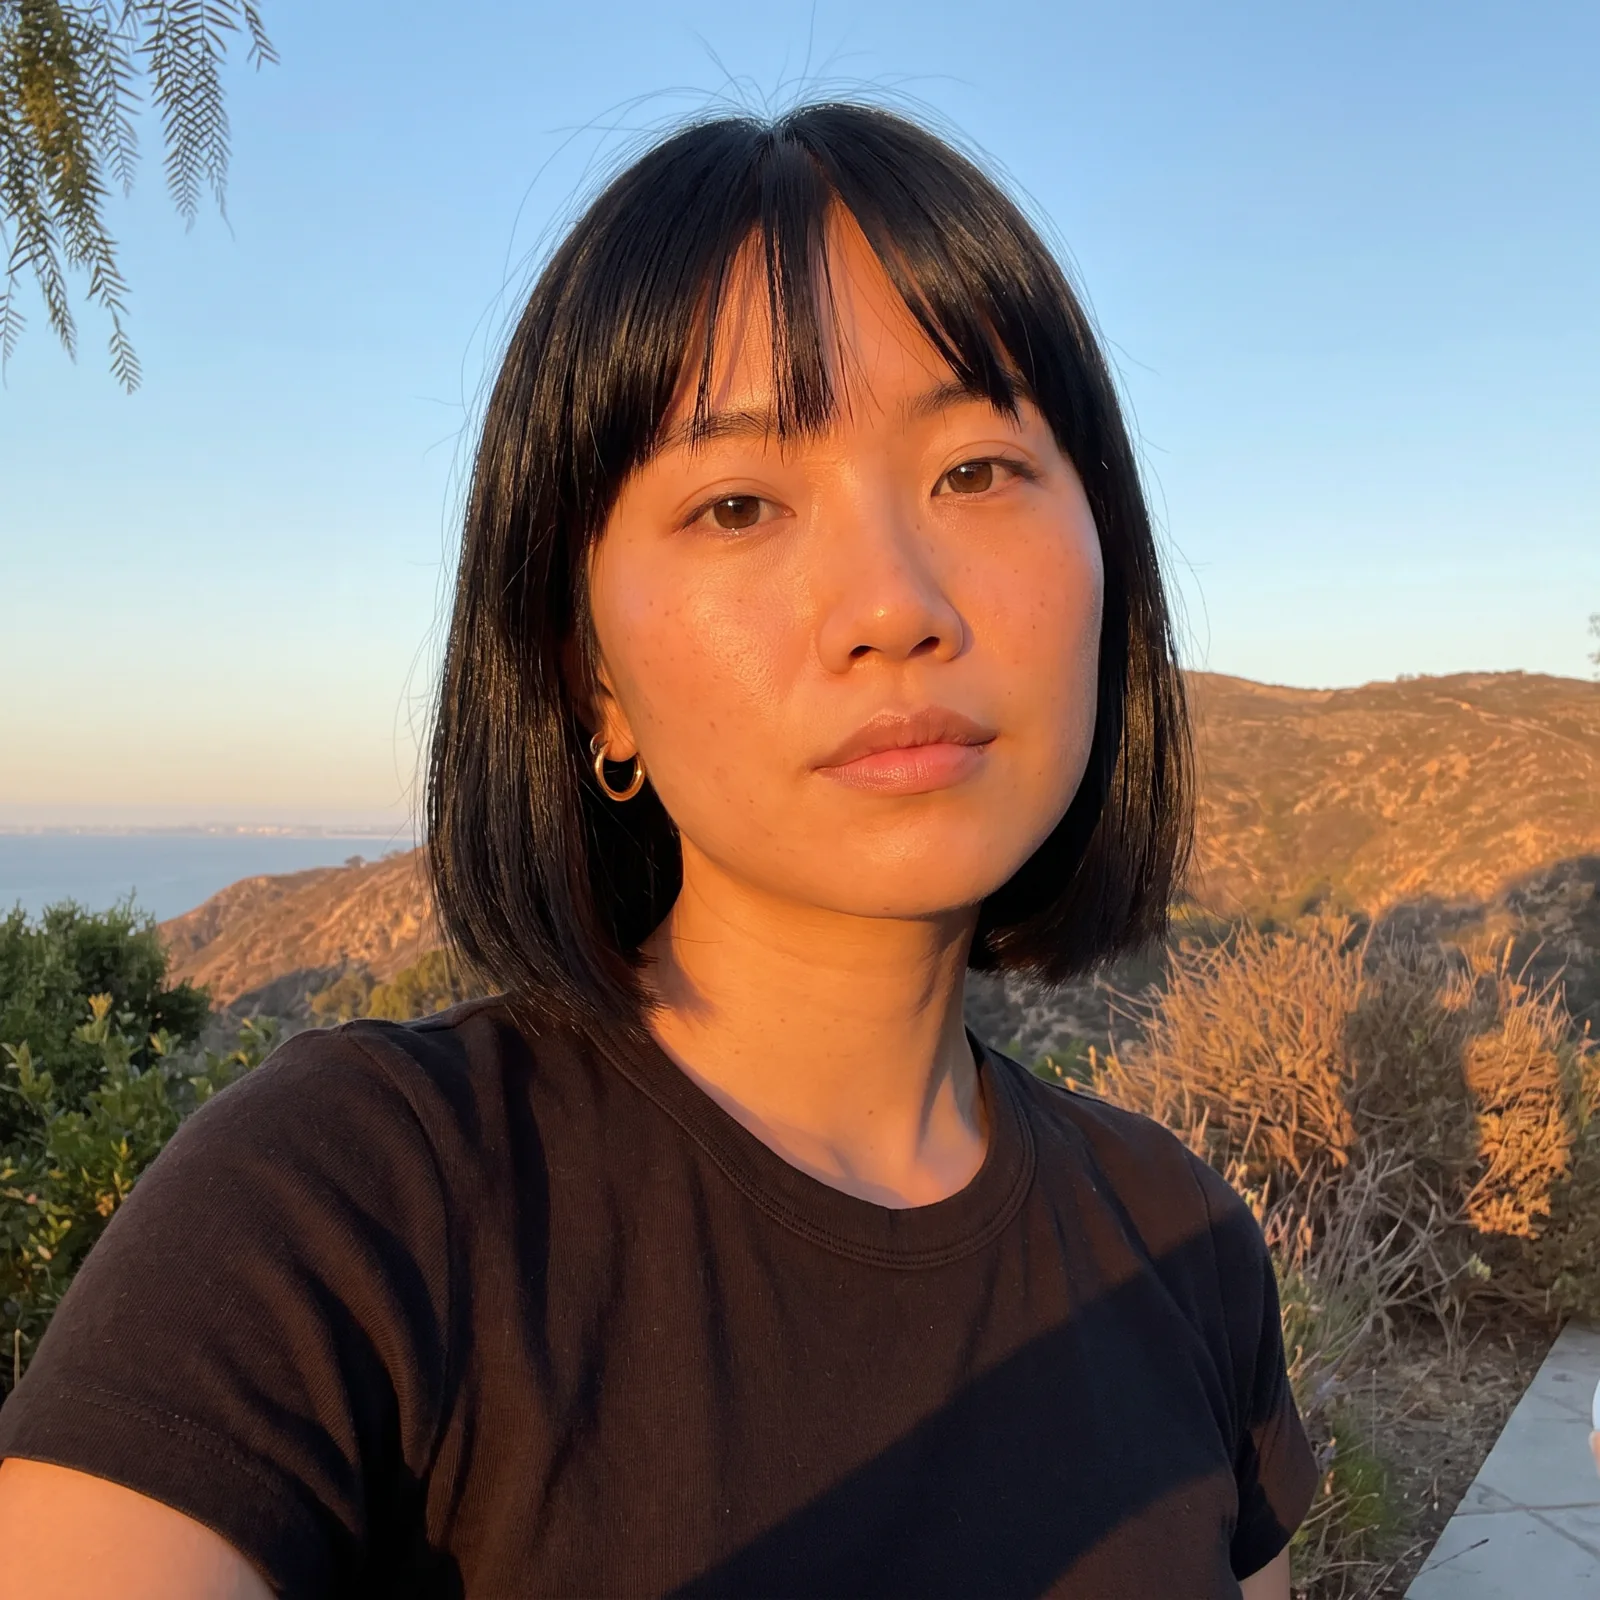
For hard side light, specify a small hard source, its direction, and the crisp shadow you want to see. The Gallery reference’s textured wall helps make that cast shadow visible. For golden hour, name low warm sun and preserve the warm cast rather than neutralising it back into a generic studio image.
For open shade, ask for the subject to face open sky beneath the leaf canopy, with no patches of direct sun. The direct-flash comparison instead needs frontal flash, a small hard shadow, and a dark background beyond flash range. Warm practical light uses an amber indoor source. Those last two are artificial-light examples, included to make the difference clear.
Soft window light — A curtained window at camera right creates a gradual cheek shadow. Gallery reference: @weddingatelier_nyc.Hard side light — Crisper shadows and a textured wall make the direction of the sun clear. Gallery reference: @katerosenberger.Golden-hour sun — Low warm sunlight changes skin highlights and the overall colour cast. Gallery reference: @elizabethwood.3.
Inspect texture and expression before calling it realistic
Compare the output with both references. Does the face still look like Mika? Does the light still resemble the Gallery photograph? A result can preserve the bob haircut but lose the facial identity, or keep the face while replacing a dramatic light pattern with flat beauty illumination. Both deserve another look.
Check the eyes, nose shadow, jaw and hair edge. Their highlights and shadows should agree about where the source is. Bright skin everywhere is not the same as believable direct light. Equally, a dark shadow is not useful if it hides the feature the portrait needs to show.
Look at the background too. Warm practical light against a dim room communicates differently from orange colour applied to an otherwise flat image. Leaves can explain open shade. A curtain can explain window light. Preserve those details when they are part of what makes the reference effective.
Direct flash · artificial — Frontal flash lights the face against a dimmer brick setting. Gallery reference: @sydney_melman.Open shade — A leafy canopy gives cooler, more even daylight with restrained contrast. Gallery reference: @siennaschmidt.Warm practical · artificial — Amber indoor light creates a warmer, lower-key treatment than daylight. Gallery reference: @antoniamilano.
Change one photographic choice in the next attempt
If the result is close, change one instruction at a time. Move the light direction, soften its edge, reduce a colour cast, or ask for more light in the far eye. Keep the standard character and the chosen Gallery reference attached so that the revision stays tied to the same visual idea.
If the identity changes, fix the identity roles before polishing the light. If the lighting becomes generic, restate the source’s visible traits and compare again. Do not accept an unrelated flattering portrait just because the reference image was uploaded somewhere in the workflow.
Save the selected Gallery item, source credit and final prompt with the output. The toggles below help draft a lighting brief, but the photographs above are real saved generations, not images produced live by changing a toggle. Use that distinction when planning your own examples.